Monday, February 11, 2013

Red Lentil Dahl

Hey ~

Today's recipe is a warm, comforting, delicious vegan meal!

Red Lentil Dahl.. which is an Indian dish that my son and I love!

Red Lentil Dahl
This recipe makes enough for 4 people plus leftovers. You can always half the recipe or double it. What ever works for you and your family!

1 cup carrots diced however big or small you want them
1 large onion diced sm to med dice
3 cloves minced garlic
1 tsp ground ginger
2 tsp cumin
2 tsp coriander
2 tsp tumeric
1/2 tsp cayenne
2 tsp salt or to taste
4 Tbls tomato paste
2 cups red lentils rinsed and picked over
8 cups vegetable broth
2 cups coconut milk
If you like cinnamon and cardamom you can add 1/2 tsp of those ea.  We don't like them in this dish so I omit them

saute onions, carrots in a little olive oil or coconut oil until onions are translucent. Add in garlic and saute for 1-2 mins. add in broth, lentils and seasonings. cover and simmer 20 mins or until lentils are tender. then add in the coconut milk.

If your vegan you can garnish with some soy sour cream or soy yogurt or coconut yogurt. If not Greek yogurt is good too.


I also made homemade Pitas to go with this and let me tell you, they were so easy and delicious to make I will NEVER again buy store bought pitas. It seems like every time I buy pitas I cut them in half and then try to fill them and they end up cracking and breaking all over the place.. WTH???

These didn't do that AT ALL!! I'm sold on homemade Pitas!!

Here is the recipe I used...Awesome homemade Pitas


I can't wait to make some Shwarma Tempeh to fill these Pitas.


Next time I make these I will try to add in some Whole Wheat flour. I will probably do half white half wheat to please my kids along with myself!

Let me know what you think of this Delicious vegan meal.

OX Sherice

Saturday, February 9, 2013

Coconut Butter

Hey Hey ~ 

How's everyone? Good I hope. 

There have been a few changes around Potter Palace..

Potter Palace.. is my home, domain, kingdom, castle, safe haven.. well you get the point!!  

For about a year now I've been thinking about a vegan diet. When I began doing research about getting fit and healthy, I started watching documentaries and reading books. Everything from Food Matters to The Gerson Miracle. And reading books like Organic Manifesto and You Are Your Own Gym.

The more I started reading and absorbing the information I was finding, the more it got me thinking. 

I'm not going to go into why you should become vegan or change your diet. It's a personal choice But I think that if you start doing some research, you can figure it out! 

 I cut out meat and dairy from my diet 3 days ago, I'm not vegan as I still eat eggs and use honey. I can see myself giving up eggs in the future but honey is just to good and I don't think that the local raw organic honey I'm getting is hurting the bees. I did choose to cut out meat and dairy for health reasons. But of course I am a compassionate animal lover too! 

I do have a background in a vegetarian diet. My family being most my aunts, uncles and grandparents are Seventh Day Adventist and growing up did not eat any kind of meat. I've always been very picky about the meat I ate and would often times choose a vegetarian dish over a meat dish. At a young age I was introduced to Textured vegetable protein (soy) and gluten steaks and all kinds of different "fake" meats by Loma Linda, Morning Star and Worthington. 

Some of my favorite meals are meals made with TVP or "fake" meats.. Shamburgers, Steaks deluxe, I love the scallops made by Worthington, dipped in Nutritonal yeast and fryed in a little EVOO (Extra virgin olive oil),red pepper flakes and sea salt. The veggie links have a soft spot in my heart.. roasted like a wiener or mashed in a sandwich like my Grandma used to make. And the only sausage I will eat or my kids for that matter are morning star links. 

I know that Soy is a huge GMO crop in the U.S. I really try to get Non GMO and Organic when possible and I don't eat a lot of soy. It can mess with your thyriod and estrogen levels. I plan on eating a lot of plants, fruits, legumes, Quinoa, Tempeh, Tofu, and some "fake"meats.

I'm looking forward to experimenting and feeling good about what I'm eating. So that's a little bit about the changes going on in my kitchen. I'm sure I will continue to have wonderful delicious healthy recipes for you! 

On to the recipe I have for you today!

*****************************************************************************************************************

Recently I began hearing about Coconut Butter. So I did some research and thought "I wonder if I can make it?"

We have a great Co-op organic market Called Main Market. You can read more about it here. They have a wonderful Bulk section so I got some unsweetened organic shredded coconut and today I made some Coconut Butter. 

Because I used unsweetened coconut I added in some agave and vanilla.. it turned out yummy.
Definitely is different but good. Since I have never bought any from the store I don't have anything to compare mine to so it's fine for me. I am curious about what the store bought kind tastes like and it's texture. I imagine I will buy some eventually.

Coconut Butter...

What you will need
Food Processor
2 cups unsweetened organic coconut
1 Tbls melted coconut oil
1/2 tsp vanilla
a couple squirts agave


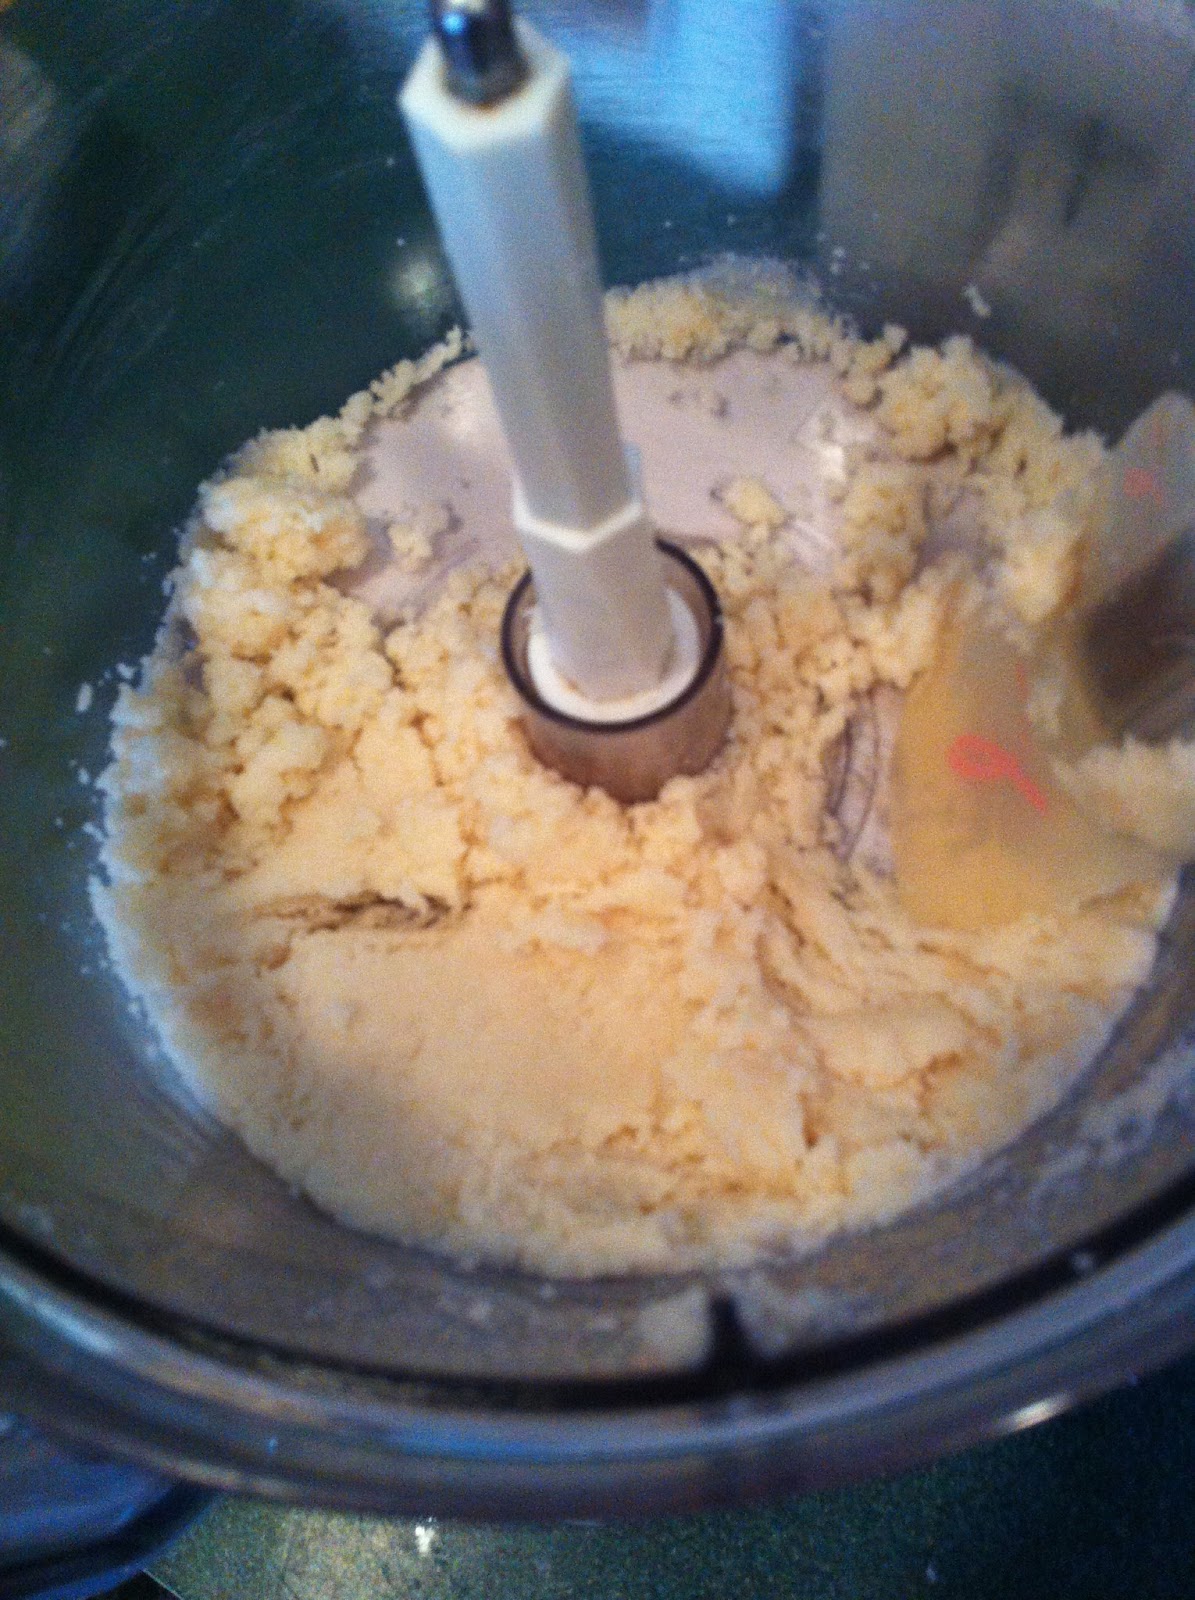
I put the coconut into my food processor and turned it on. I let it process for about 5 mins stopping once to scrape down the sides. Then I added in 1 Tbls melted coconut oil, 1/2 tsp vanilla and a couple squirts Agave. Started it back up and let it go for about 7-10 more mins stopping periodically to scrape the sides. 


 This is what it looked like at the end.. 


it still has a little texture, so it's not smooth like regular butter. but it's oh so yummy!! and instead of costing me almost 10 bucks, the coconut cost me about $5 for a lb. I had all the other stuff in my cupboard!

2 cups made 1 pint of butter.


I made a dip of Chocolate PB2 and Coconut butter to dip my banana in and OH. MY. HOLY. GOODNESS!!! 

But that's a post for another day! 

OX Sherice


Tuesday, January 15, 2013

Hummus Tuna on Ezekiel

Sometimes I really amaze myself.....

I've had some veggies in my fridge for a while now and they've been on my mind.. like I need to cut and eat those dang veggies before they turn gelatinous and stink up my fridge!

While I was at Trader Joe's last week I found some Roasted Garlic Hummus that screamed at me....BUY ME AND EAT ME!! I'm a lover of anything garlic and roasted garlic is even better!

So while I was cutting up my veggies today I suddenly had this AH. MAZE. ING. thought!!

What if I used the hummus as the binder for my tuna fish??  I've heard of Greek yogurt or Avocado but never Hummus..

That's how my Hummus Tuna open face sandwich was born....

Hummus Tuna


1 can white albacore tuna.. I was reading that you shouldn't eat white albacore tuna b/c it's high in mercury?? I will have to do more research on that and if it's true, well my heart will be broken.

a little chopped onion
a little chopped red pepper........ just eyeball the veggies, what ever you think is good, is GREAT!
a little chopped celery

6-7 shakes of Dill or whatever you like.. next time I might try lemon pepper (not that many shakes of course)

3-4 spoonfuls of Roasted Garlic Hummus.. or whatever hummus you like. I used 3 and it needed 1 more spoonful.


spread on your choice of bread, cracker, pita, or even lettuce..

I chose Ezekiel bread


and topped it with some homegrown clover sprouts..


The only thing that could have made this sandwich better was a ripe red tomato sliced on top!

DELICIOUS!!

Am I a genius or what??


When I sit at my table on the computer, this is what happens.....

I always get company. Say Hello Marley!
 

What was your last great recipe invention? 

Do you like sprouts or lettuce? 

Do you have any pets? 

Sherice OXOX


Saturday, January 12, 2013

Oatmeal Lavender Face Scrub

It seems that I'm a bit obsessed this week with homemade beauty products!

I made this face scrub and gave it to my sister. I haven't used any yet but she said her face felt wonderful after and the calming scent of lavender is exactly what she needed after a long hard day! 

 Lavender Oatmeal face scrub

What you'll need:
1 cup Oatmeal
1/3 or more Coconut oil melted
15-20 drops Lavender Essential oil   


First I put 1 cup oats in my magic bullet so they would be a finer texture. 


Then I added in the melted Coconut oil, and lavender 

mix well and put into glass jar 


 This Face scrub is very gentle... 

Benefits of oatmeal ~ 
  • Oatmeal has anti-inflammatory properties and is perfect for most skin types, even the most sensitive skin
  • Oatmeal contains saponins, a cleansing agent, and can therefore be used as a mild soap
  • Oatmeal is moisturizing and helps remove dead skin cells.
  • Oatmeal can help treat acne, eczema, rosacea and rashes
  • Oatmeal can helps relieve symptoms of aging skin 
Info from here  

 Benefits of Lavender ~ 

~ Headaches and migraines - Lavender essential oil has a calming aroma which makes it an excellent nerve tonic. It aids in treating migraines, headaches, anxiety, depression, nervous tension and emotional stress. 
~ Insomnia – Lavender essential oil is ideal for those who have trouble falling or staying asleep as it improves the length and quality of sleep.
~ Scrapes and wounds – Due to its powerful antiseptic properties, Lavender essential oil can increase cell growth and aid in the formation of scar tissue. It has been used to heal wounds, cuts, burns and sunburns rapidly. 
~ Anxiety and depression - It is an excellent tonic for the nervous system. It’s known to remove nervous exhaustion and restlessness while increasing mental activity and relaxation. 
~ Skin care – Just like it can be used for scrapes and wounds, lavender essential oil can also be used to treat skin disorders such as acne, burns, dry skin, eczema, itchy skin, sunburn, seborrhea and skin inflammation. 
~ Pain relief – A regular massage with Lavender essential oil provides relief from pain in the joints as well as pains caused by sore muscles, tense muscles, muscular aches, rheumatism, sprains, backache and lumbago

info from here

In this post you will learn all about the benefits of coconut oil on your skin

I hope you give this face scrub a try. I can't wait to make some for myself! 

Sherice oxox


Friday, January 11, 2013

Whipped Body Butter

Hi There ~

I don't know about you but where I live it's cold and snowy! My skin is dry, itchy and looking for some thirst quenching lotion!

Did you know that your biggest organ is your skin? And when you use products with chemicals and perfumes those are absorbing into your body and then into your blood stream. I always find it interesting that people are so careful about what they eat aka put into their bodies but a lot of people don't even think about what they are using for sunscreen, lotion, face creams, eye creams, perfumes.. These products affect your Endocrine system.. aka your hormones!

As I was trolling around pinterest I found some amazingly easy options for beauty and skin care.. like so easy I couldn't believe it could be so easy!! But in usual Sherice fashion I thought how can I do this and make it my own?

well I got my brain working and ideas just started coming... like a flood, if you will :)

I want to share these with you because I'm a firm believer in sharing is caring and I care for all of you! I hope that you will enjoy these as much as my sister and I do!!

Whipped Eye Cream

2 ingredients.. that's it!!

Coconut oil, vitamin E oil... before I get into the how to's of it.. let's spend a min on why coconut oil and vitamin E...

Coconut oil ~

1. Coconut oil is nature's most abundant source of Medium-Chain Triglycerides. When applied to your skin, your natural good bacteria convert these Medium-Chain Triglycerides into Antimicrobial Fatty Acids. Antimicrobial Fatty Acids prevent viral, fungal, and bacterial infections, including yeast! Antimicrobial Fatty Acids act like nature's natural bodyguards for your skin. In other words.. it will help with blemishes and breakouts.. clearing up your skin

2. Coconut oil is vitamin enriched with vitamins A, B, C, and E, and nourishes your skin, coconut oil is a natural anti-oxidant that helps the skin repair itself. Coconut Oils protective anti-oxidant qualities protect the skin from free radicals and other environmental aging factors.

So coconut oil helps heal your skin of wrinkles and helps with younger looking skin

3. If your using pure virgin coconut oil.. which you should be, it won't clog pores

info from here and here

Vitamin E ~

1. Vitamin E is also a natural antioxidant.. in this day and age we need all the help we can get against all those free radicals roaming around, right! YES!!!

2. It helps in the healing process and prevents scarring

3. It's also moisturizing and helps healing of sunburns and cold sores.. which I'm sure to get when my lips are really dry and chapped! Did I mention that this could also be used as a lip cream.. A FLOOD I TELL YOU!!!!

4. last but not least Vitamin E will not clog pores.. so it's perfect for your skin.

info from here and here

Now lets get to the how to's, shall we?!

start with 1 cup coconut oil.. DO NOT HEAT OIL!! you want it to be solid. put into your kitchen aid. Add in 1 tsp of Vitamin E oil

I used Vitamin E capsules b/c when I went to get the oil, Walgreens was out of the stuff.. really?! popular stuff. and so I improvised.. wow that was a good thumb workout as it was about 25 capsules to get almost 1 tsp of oil.. END RANT!!!

Turn on mixer to 8 and mix with your whisk attachment for 6 mins or until light, airy, fluffy and wonderful..


once done I put it into these little pill containers I found at Walgreen's. 

This is light and fluffy. It melts into your skin on contact and leaves your fragile eye area soft, smooth and eventually wrinkle free.

Always remember when you are applying anything around your eyes and your using your fingers, always use your ring finger.. the skin around your eye is the thinnest and most fragile skin on your body and your ring finger is your weakest finger. You don't want to do damage by pulling and tugging around your eyes!

Once I was done with the Eye Cream I started on the Whipped Body Butter by adding in 20 drops of Lavender essential oil to the whipped eye cream still in my mixer bowl

make sure that if you use fragrance your using Essential Oils Not Fragrance oils. Essential oils are the real deal and ok to use on your skin. It's not the same as the oils you can buy at Bath and Body works for that cute oil burner you have.

you can learn about the benefits of Lavender essential oil here


once I added the lavender I turned back on my mixer for a few seconds to incorporate it.

when done put it into a jar and keep it where ever it's handy!!


I immediately slathered this stuff on my arms... which felt like a baby's bottom for the rest of the night! The smell of lavender is soothing, calming and my serenity!

This whole process took about 10 - 15 mins.. and if your not having to squeeze vitamin E oil out of those dang capsules it will take you less... so make some, your worth it!!

Sherice oxox


Monday, January 7, 2013

Dried Fruit Snacks

I have this wonderful contraption called a food dehydrator that I borrowed from my mom quite a while ago.. it's been sitting in the box taking up space and today I had this amazing thought..... "what if I actually used the damn thing!"

So I did!!

Dried Fruit Snacks......

What you'll need..

Tools I used...


First step: peeled and cut fruit


I didn't cut it to thick, I do think for next time I will cut it a bit on the thicker side.. I like to have a bit of  "meat" when you bite into it!


Next step: I sprinkled them with cinnamon.. I only sprinkled one side, and then loaded up the trays...


Then I let these little morsels of tasty fruit dry for about 7 hrs. Every couple of hrs I would rotate the trays.. they stack in a triple layer. At the half way mark I flipped the fruit.


When done the fruit was sweet, chewy and delicious.. Everyone in the house, dogs and humans thought it was The Bomb!!


It didn't last long.... YUM!!!

Sherice oxoxox


Wednesday, December 19, 2012

Zucchini, Caramelized Onion & Gorganzola Pizza

Hello Lovelies ~

It seems Christmas comes faster and faster every year. Why is that?? My menu for the holidays looks something like this..

Chili Cheese log and crackers
veggies
Baileys and coffee
this delicious Kale and Quinoa quiche recipe Christmas morning
Lasagne meat and veggie (Christmas dinner)
Buffalo Bread ( CD)
garlic bread (CD)
Cesar salad (CD)
a delicious cherry and pistachio choc tart  (CD)
Truffles, Baileys and Peppermint

and probably some other delicious things....

What's on your holiday menu??

So lets get to this AMAZING pizza...

This is my favorite pizza! Easy to make and it doesn't weigh you down.


What you will need ~
 Pizza crust
1 baby Zucchini
1 onion
1 sm clove garlic
Extra virgin olive oil
Gorgonzola cheese
Mozzarella cheese

First you want to thinly slice 1 onion and put into pan with a little extra virgin olive oil using a low to med heat caramelize your onions.

while your onions are caramelizing you can go ahead and put your pizza stone or baking sheet into a the oven and turn it on to 500. Let your pizza stone or baking sheet preheat with the oven!!!

At this point you can start getting your crust ready. You can either make homemade pizza dough or buy some fresh dough at Trader Joe's or Safeway. Cut the dough in half.

 Put dough onto a piece of parchment paper that you've sprinkled with a little cornmeal.

I use a rolling pin to roll the dough. I roll my dough out very thin so I get a crispy crunch with every  bite!

after your onions have caramelized take them out of the pan and put into a bowl for when your ready to assembly your pizza. Now you can use all of the onions, but I often save some to use in something the next day.

Now you want to cut up your zucchini into about 1/4 in slices and saute them just for a few mins on each side. when you flip them to the other side add in your minced garlic.

when your Zucchini is done get them out of the pan and into a bowl or on the counter and get ready to assembly your pizza....

start by spread about 2 tsp of EVOO onto your pizza crust with a brush. Then add your zucchinni in a single layer. I put mine on like pepperoni. Then add your onions.

Then you want to add on your cheese.
I'm generous with the Gorgonzola but I only use just a sprinkle of the Mozzarella. There was the perfect amount left in the bag.

Now your pizza is ready to go into the oven. Pull out your preheated pizza stone..
Use caution as it is flaming hot!!!!  


 slide the parchment right onto your pizza stone or pan. Cook for about 5-7 mins!


I know you will LOVE this pizza as much as I do. I leave it to cool on the pizza stone and I find that it keeps the crust really crunchy.

ENJOY!!

OX Sherice